- Get link
- X
- Other Apps

Ready to transform your home network into a fortress against online ads? Look no further than Pi-hole, the DNS sinkhole solution that promises ad-free browsing bliss. In this comprehensive guide, we'll take you through the exciting process of installing Pi-hole on your trusty Raspberry Pi. Let's dive in and revolutionize your online experience!
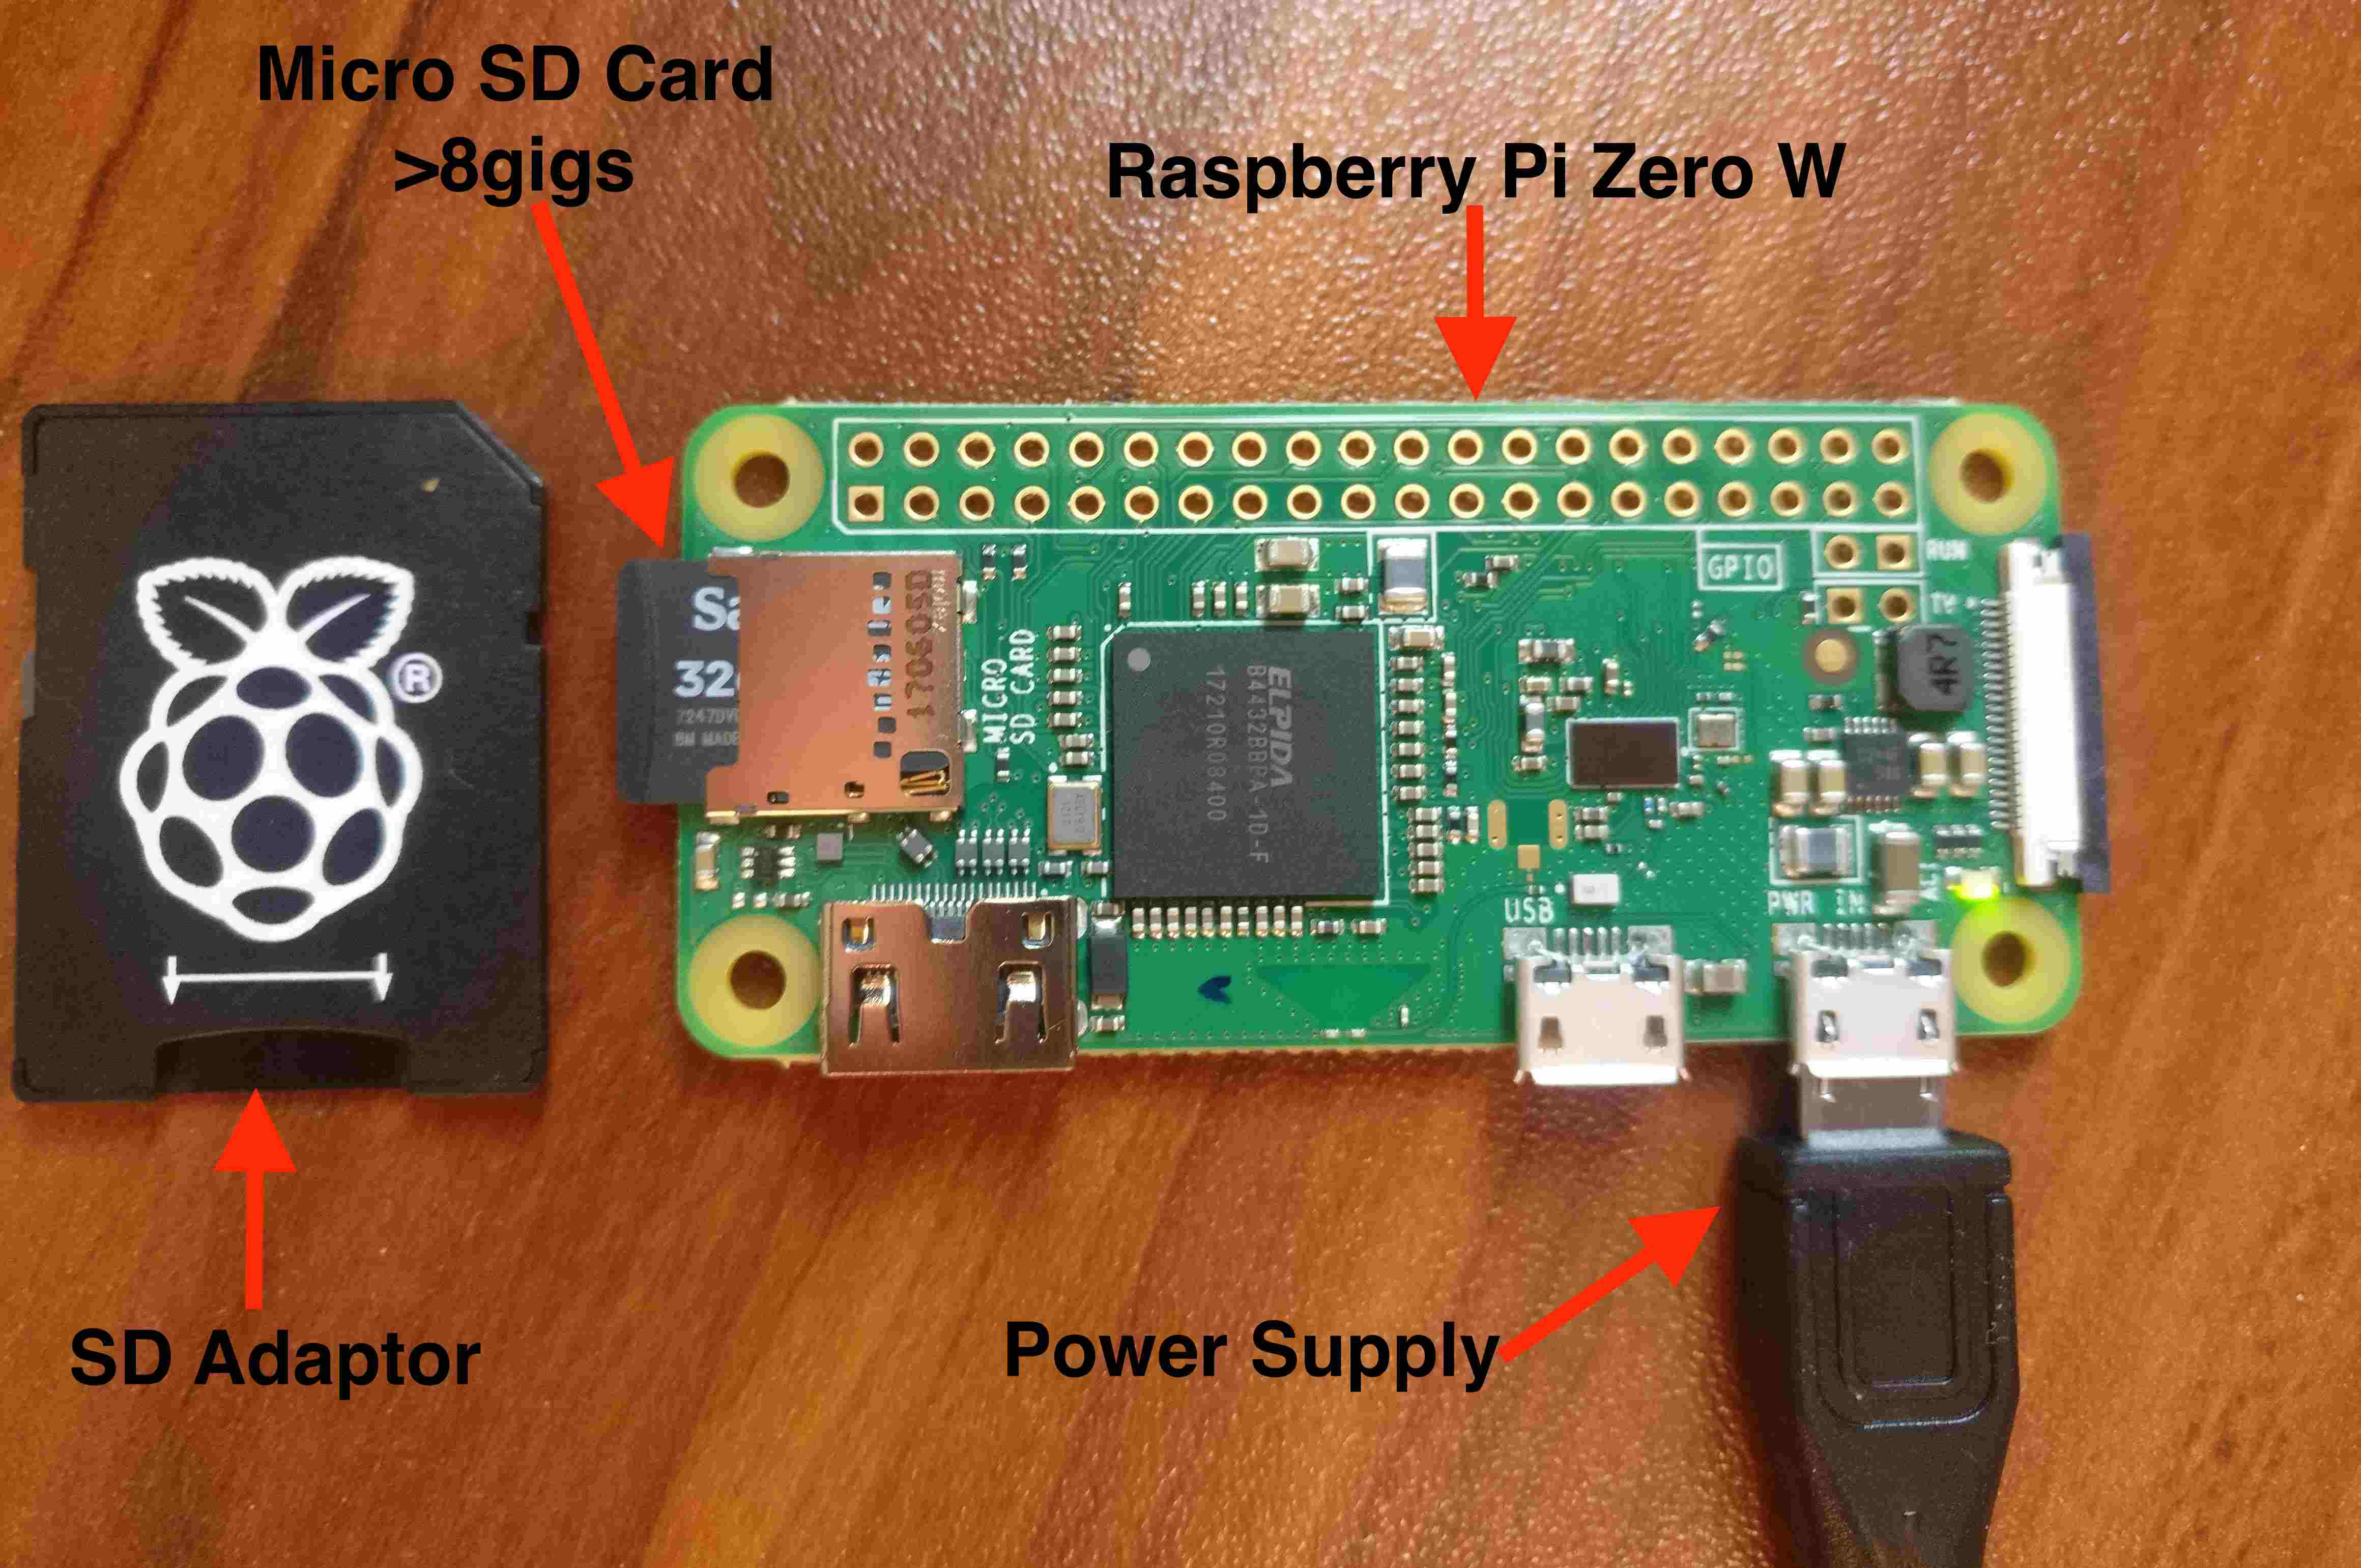
Step 1: Flashing the OS on Your SD Card
Begin your journey by selecting a 16GB SD card and opting for the Raspbian OS for your Raspberry Pi. BalenaEtcher is the tool of choice for flashing the image onto your SD card, making the entire process on macOS a breeze. Before you embark on this adventure, don't forget to back up any essential data.
Feeling adventurous? Try out both "Raspbian Buster with desktop" and "Raspbian Buster Lite" for a taste of experimentation.
Step 2: Wiring up Your Raspberry Pi
Get ready to bring your Raspberry Pi to life by connecting all the essential components. Whether you have an older model or the latest Model 4, ensure a seamless setup with a USB keyboard and mouse, HDMI cable for display, LAN cable for networking, and, of course, the power source. If you're using Model 4, follow a handy guide on the official RPi website to set up Wi-Fi.
Step 3: Power On and Witness the Magic
Insert the flashed SD card, power on your Raspberry Pi, and witness the startup magic. If you're using Raspbian Desktop, your successful startup will be a visual treat. Opted for the headless version? Get ready for a lean, clean, and delicious screen.
Step 4: Post-Startup Configuration
After the successful launch, it's time to enhance security. Change the default password (pi:raspberry) immediately and consider adding new users for an extra layer of protection. Take it a step further by disabling the default sudoer pi and replacing it with your chosen username.
Step 5: Enable SSH and Discover Your Raspberry Pi's IP
Boost security by enabling SSH and finding your Raspberry Pi's IP. Use the default hostname raspberrypi.local or conduct a blind network scan. Personalize your setup further by changing the default hostname.
Step 6: Keep Your OS Up-to-Date
Stay ahead of potential threats and boost performance by keeping your OS and packages up-to-date. Simple commands like sudo apt update and sudo apt upgrade can make a significant difference. Depending on your Raspberry Pi's specs, the headless version may take around 30 minutes, while the desktop version could take up to an hour.

Step 7: The Grand Finale—Install Pi-hole
The moment you've been waiting for has arrived! Follow the installation guide here for a smooth setup. In my case, on an ancient RPi, the installation only took a mere 15 minutes. Once installed, access the admin panel via the IP address or your chosen hostname.
Bonus: How to Shutdown Your Raspberry Pi
When it's time to bid adieu to your Raspberry Pi, do it gracefully. Run sudo shutdown -P for a shutdown after 1 minute, or opt for a quick farewell with sudo shutdown -P 0.
There you have it! Your secure, ad-free browsing experience is now a reality with Pi-hole on your Raspberry Pi. If you're as thrilled as I am, consider supporting the Pi-hole community with a donation. Happy browsing, and stay safe online!
Comments
Post a Comment